The A7/A7R Metabones Adapter Review for Canon and Nikon to E-Mount is finally here
and I had a good amount of time to test the third party metabones adapter on both the major lens systems.
Here's my breakdown:
Canon Metabones Adapter Pros:
Auto Focus
No need to touch the metabone adapter during operation
Solid build quality
Canon Metabones Adapter Cons:
Slow to focus (although quite sharp and accurate)
Bit of a tight squeeze and no click when you attach a lens
Nothing else to report really
Nikkon Metabones Adapter Pros:
Great fast manual control
Solid build quality
Clicks on and off easily
Nikkon Metabones Adapter Cons:
No automatic model available
Can't see actual aperture whilst shooting
Nothing else to report.
What a year it has been for Sony and their Mirror-less camera range from the NEX refresh to the RX-1, RX-1R and now the A7 and A7R.
We all knew the Sony A7 was coming, it had been rumoured for the past year and indeed here they are. The video covers all the main points of the A7 and it's been a very photographic weekend for me personally. I started with some long exposure photography, moved to car photography, portrait photos, and finally some nature shots with Kitty, my pet Caique parrot.
The Alpha 7 ditches the NEX branding in an effort to be seen as slightly more professionally inclined although the pricing of both the Sony A7 and A7R is well within consumer and enthusiast reach. The real brilliance of this system is the use of the E-mount in a full frame sensor and it opens up the possibility for most photographers to simply jump on board with their existing glass without too much trouble.
I know one question is bound to be asked by those watching this video and that is "Should I choose the A7 or A7R?"
The answer is a bit more complex than you would think and no, I don't recommend jumping onto the A7R just because you can afford it. In fact, it's all down to what type of photography you plan to do primarily.
A7:
Built for speed, great burst mode, faster at focusing with phase detect autofocus
Smaller MP count but better ISO performance in low light
Meant for shooting moving subjects
A7R:
Massive 36MP sensor, great for landscape shots and huge prints
Slower shutter speed and larger files to process
Magnesium alloy front, made for super zoom lenses
Billet cut dials for a slightly more premium feel.
Hope it helps guys, hit that subscribe button and don't forget to like my video up!
The Sony A7/A7R (Alpha 7, Alpha 7R) Battery Grip is finally here and I'll be doing a full hands on review of it and how to install it! The VG-C1EM makes shooting portrait style much, much easier and all the while you're able to double your battery life and increase the amount of stability you have as well.
Pros:
Great stability regardless of whether or not you are shooting portrait or landscape.
Only drains one battery at a time.
Doubles battery life of the A7 or A7R
Exactly the same layout as the A7 in landscape with a manual focus button, custom button, two dials and a shutter
Cons:
Preview mode still thinks the camera is shooting in landscape
It doesn't make you coffee in the morning or tuck you in at night.
Overall, a great accessory, probably by far the most important one for the Alpha 7 and Alpha 7R.
Be sure to check out my Alpha 7 (A7) Review here: http://youtu.be/WrVYcdOXDSE
Hi guys welcome back to Its Dan K reviews.
Today we are looking at the HTC One, the phone that shouldn’t be able to
receive WiFi, Bluetooth or LTE signals but does so due to some pretty brilliant
engineering.
The phone reeks of desperation, financial desperation
that is. Quite a few balance sheets and the last three quarterly results
suggest that this may just be HTC’s last throw of the dice. The CEO even came
out to say that if this phone isn’t a runaway success, he will personally step
down from his position. So, if HTC are willing to bet a single phone on the
company’s entire future, you’d expect this phone to be at least decent.
I think I’ll start at the design because
it’s the most obvious place to start and by now I’m getting use to people
asking asking to hold the device, almost as if they’ve never seen a mobile
phone before. It’s a large phone but it doesn’t feel large, the curved back
fits nicely in the palm and the sand blasted aluminium reminds me of the
macbook pro. Of course, this phone was designed to convert a few i-sheep here
and there and HTC have made no secret of this either, they’ve even coupled a
lovely itunes contact sync app into the sense launcher, a smart software
decision, something I’ve rarely ever said when it comes to HTC.
The diamond cut chamfered edges, laser cut
speaker grills, CNC machined unibody and milled polycarbonate make this phone a
looker, it’s certainly a welcome departure from the sea of plastic fantastic
Galaxies and all too common iphones available on the market. The Camera is a
4MP ultra pixel shooter that features larger pixels for greater low light
performance and it’s got optical image stabilisation to assist in making your photography
experience largely blur free. The speakers are large and front facing, HTC
calls them “boomsound” speakers, one of the few marketing terms that actually
lives up to the hype. All of this and I haven’t mentioned the screen which is a
4.7 inch super lcd 3 panel of full hd resolution, it lays claim to being the
most pixel dense screen on any mobile device ever with a mental 469 pixels per
inch.
So after a week with the device, what do I
like? What don’t I like? How have I adapted the phone to suit me?
Well for starters, I like the camera. I
like it, a lot. I’ve been waiting for the day where I could use a phone to
start my own Video blogging and that’s exactly what I’ve been able to do with
this phone and in fantastic quality as well. You can check out those HTC One
filmed videos out in full by visiting my personal channel or heading down to
the bottom of my itsdankreviews youtube page.
Pictures with the rear facing camera look
great, indoor shots look even better thanks to the pixel size but where this
phone really excels is in the low light shots it’s capable of although be
warned, that only applies to the rear facing camera, the front facing camera is
actually quite full of noise in most of the shots I attempted either indoors or
in low light. The default camera is quite good in that it’s actively designed
around the touch to focus and shoot principle, which, mostly reduces camera
shake at the expense of a delay in shooting. If you don’t want to miss a second
though, there is the Zoe mode which takes a combination of burst stills and
video.
On to the IR blaster and I never thought
I’d use it but here I am, I don’t even want to go back to my traditional
remote. It’s great for turning the TV on and quickly accessing all the shows
that are currently showing and going to be on. It’s useful. I like it. A lot.
Now onto the software and you’ll see that
I’ve replaced blinkfeed and quite a large part of the sense interface with Nova
launcher. Blinkfeed, for one, was just bulky and made it harder for me to
access the content I wanted to upon unlocking my phone. RSS feeds are also not
supported so good luck finding the type of news you actually want if you are in
any way source picky (which I am). There are some positives though, the phone
app is in my opinion, much improved over previous versions and I actually
prefer it to the stock phone application that I’ve been using on my galaxy
nexus. The reasonis simple, I can predictive text reveal contacts just by
dialing. This is something that’s been around since Nokia 3310’s and it’s a
shame that stock android never adopted it.
The colour reproduction on the screen is in
my mind, excellent, it’s easily one of the best viewing experiences I’ve had on
LCD. Viewing angles are good and 4.7 is big but I would have preferred a 5
incher on a phone of this size. The button arrangement is new for HTC, a double
tap opens the multitasker whilst a long press gets you into google plus. I
still would have liked to have the HTC button bring me home but it’s okay, it’s
not hard to get use to.
On the subject of getting use to things,
there is one, massive, design flaw that has existed on every single HTC device
since forever and it’s even worse with this phone. It is. The power button. HTC
have flat refused to bring the power button to the location that makes the most
ergonomic sense, the right thumb. The power button is placed on the top left of
the device. This makes unlocking your phone a largely uncomfortable one handed experience
as you attempt to shuffle a finger to the top left whilst using your thumb to
swipe up to unlock.
If you can get past that design flaw then
maybe, just maybe this is the phone for you. As far as battery life goes you’ll
easily get a full day of use although your own mileage may vary. The phone
additionally features AC Wireless which, when coupled with an AC router will
turn your 4G LTE outdoor experience into a 5G WiFi experience when at home.
In conclusion, I highly recommend this
phone if you want the best in hardware design and one of the most satisfying photography
experiences that you can get on any android device available.
It’s been Dan K, don’t forget to subscribe
by clicking the middle of your screen and more importantly, like the video up!
Ask any questions in the comment section below and I’ll see you guys, next
time!
Hi guys welcome back to itsdankreviews, today we are looking at the beats solo headphones. From the get go I can tell you that the build quality is impressive, it's well crafted and in my mind it looks good on my head as well but that's about where the quality ends. The first time I played a song with these on my head I thought the unit was broken and after a bit of a play around I discovered that this is just how the unit, actually, sounds.
It's as if the design portion of this headphone took 50% of the budget with an additional 40% going towards marketing and finally the last 10% was invested into two incredibly small audio drivers which repeatedly succeed in underwhelming the listener with under tuned mids and undefined treble. Maybe the festival of bass was further amplified by an equally bass laden equalizer, the kind you can find turned on by default on the HTC One. Ironically, when "beats mode" is turned on and you're actually using beats headphones, the result is that you need to turn the volume up to actually hear lyrics and by the time you do that you've exceeded the spectrum of base that the headphones can actually deliver which results in a sound that's pretty close to an un tuned radio.
Short conclusion? For 250 Aussie dollars go do yourself a favour an buy the Klipsch s4 in ear's for 60 bucks on ebay. Not only have they been the best in ears you can buy at that sound price, you'll also not be wearing a big label on your head notifying everyone that you've spent 250 big ones and have no idea what sound quality is. Better yet, 250 can get you some decent audio technica's or the Klipsch x10i in ears. Hope you guys enjoyed the review, be sure to hit the like button and subscribe! It's been Dan K, cya guys next time.
Welcome back to ItsDanKReviews, today we look at the HTC One and it's Camera, Video and Audio quality through a bunch of samples I took and edited together during the day.
All samples from the HTC One are 1080p bar the photos which are all native 4MP stills. Low light photos are an area of which the HTC One excels in as you can see from the footage although low light video seemed laggy at best and I wouldn't particularly recommend turning that mode on for filming at least. I haven't tested HDR footage just yet and then there's Zoe's which is just an entire other area to have a look at as well.
Are you impressed? What do you think? Let me know in the comments section below!
Hi guys welcome back to Its Dan K reviews. Today we are looking at the world's smallest WiFi router, it's the ASUS WL-330NUL. It's small enough to fit in your pocket and that's mainly because it's designed for those who travel quite a bit. In comparison, it's a little bit bigger than a Double A battery and much smaller than an eclipse mint can.
Basically the ASUS WL-330NUL is a plug and play device on Mac's and a short install device on windows. Simply click the router icon when it's plugged in and install the router utility, select advanced to see the wireless key and use that to connect external devices such as other laptops, mobile phones and tablets. When using the device when it's not connected by USB to a computer, the WiFi password can be found on the side.
You can broadcast the net from any Ethernet cable that is delivering it and you can power the device from the wall with the included Wall to USB charger. If you suffer from battery anxiety and have bought a powerbank, you can also use this to power the unit.
The pocket router works without an Ethernet cable as well and can rebroadcast current connectable WiFi signals from your laptop just by connecting to them, particularly useful if you are using a pay as you go log on internet system, the type that is found at many hotels, airports and transit lounges worldwide.
Hope you guys enjoyed the review, if you've got any questions, hit me up in the comments section below and as always, it's been Dan K, like the video up and subscribe by clicking in the middle of your screen! Cya guys next time.
The ASUS GTX670DCUMini Review is finally here and wow, this card sends a big message indeed. I remember only a few years ago when mITX was considered a niche HTPC market and in that time BitFenix has done their best to popularize the platform with gaming enthusiasts and companies like ASUS have released fully featured, fully overclockable motherboards such as the P8-Z77i Deluxe.
They've gone one step further though and today we are having a look at the ASUS GTX670DCUMini, a hugely powerful card in a very, very small form factor. Is this your next GPU for your up and coming mITX build?
Benchmarks used: Battlefield 3 and 3DMark11 Performance Preset.
ASUS HD7790 DCUII OC Review and Game Benchmarking
The ASUS HD7790 Review is here and AMD is just milking the mid range market at the moment, especially with this offer which as you'll see, is a fairly good candidate in the price vs performance stakes.
I felt the need to review a few mid range cards before we are all swamped by the likes of the new Nvidia 700 and AMD 8000 series respectively. It's good to see that these kind of cards are leading a push within the budget conciousness masses.
Battlefield 3 for all, it's a novel quest.
ASUS GTX650 Ti Boost DirectCUII OC Review and Benchmarking
Welcome to the ASUS GTX650 Ti Boost DirectCU II OC Review and Benchmarking video. It's another budget and size concious offering from Nvidia but at least it pulls it's weight around in the performance department. You know it's nearing the end of the GPU cycle when the second round of midrange chips are released and that means bargains, lots and lots of bargains.
Just like the ASUS HD7790 DCUII, this card pulls on the upper regions of the performance scale at around 5000 to 6000 on the P score preset in 3DMark11. Whilst not mind blowing hardcore performance, it does give those on a budget the chance to play Battlefield 3 on Ultra with nice and stable mid 40 frame rates.
Like what you've seen? Got any questions? Be sure to subscribe to me by hitting the link below!
It's here! The HTC One Spigen SGP UltraCrystal Screen Protector Review and Install!
So if you watched my previous review on the Glas.T that Spigen makes for the HTC One, you'd realise that it doesn't work and has since been recalled by Spigen themselves. Fortunately for HTC One owners, there is light at the end of the tunnel.
I've had my doubts about expensive plastic screen protectors and that's mainly due to the fact that they're plastic, how good can they get? The Ultracrystal from SGP though, as you'll see, it's pretty damn good. The clarity is great because you can hardly even notice that the screen protector is even there.
I'm going to have to highly recommend this one, it's worth every cent.
Welcome to the BitFenix Prodigy Review and Assembly guide that I've put together as a part of a larger project to deliver graphics card reviews on this channel as well. BitFenix went all out to provide a life saver to the LAN building market.
mITX motherboards have been gaining traction especially within the small form factor movement and modders and case builders have largely been testing their skills with the Prodigy as it provides a very easy to sculpt, blank canvas. Practically every GPU on the market bar the three slot monsters can fit inside the BitFenix Prodigy and my word, for a mITX case it is an absolute stunner. It's got enough room for a decent amount of watercooling and if you have the chance, absolutely throw in a all in one cooling system like the Corsair H80.
BitFenix was also kind enough to send me a cache of their own Alchemy cables, the fabric sleeved extension cables make any build look the part, as you can see in the video.
A big thanks to BitFenix for sending through the Prodigy, be sure to subscribe to us by clicking on the link below!
The ASUS Designo MX239H 23 Inch Full HD Monitor is a bit of a change in terms the panel designs that have endlessly come out in 2013. It's frameless edges and aluminium bezel compliment a sundial inspired stand and the package is made even sweeter with an AH-IPS Display to top it all off.
Check out the full review and ask any questions you may have of the Designo series down below, don't forget to subscribe by clicking on the link below!
Today I review a 6000mah Powerbank that I found on Deal Xtreme! These things can charge all the latest phones including the iPhone 5, Samsung Galaxy S4 and a whole host of devices that can charge through USB.
Main point, Tablets, Mobile Phones, GPS Devices and whatever else that needs USB power can be fed off of a powerbank like this.
Here's the ASUS Transformer All in One P1801! The specs for Australia haven't been finalised so forgive me if I'm a bit vague in that regard but what I can tell you is that it's a dual operating system device with a full copy of Windows 8 and Android and the screen itself is quite pixel dense and houses a full LED Backlit, Full HD 18.4 inch IPS display. 10 points multitouch as standard and the unit comes with a wireless keyboard and mouse that you'll actually want to use and both peripherals come with a quality brushed aluminium finish which is nice to see.
If you know nothing about this product, you'll be surprised to learn that what you are looking at is essentially a detachable tablet and yes, you can run Windows 8 through remote access and Android whilst in Tablet mode too. The tablet has its own charging port and kick stand and the dock can run an external monitor for Windows 8 as well if someone has knicked off with the tablet to play candy crush.
Lifting the tablet off the dock is simple. There's a latch at the back that makes the process quite easy and re-docking is a simple matter of lining the device up to the centre of the device and carefully dropping it downwards. It's an interesting device especially for those who use android for entertainment but admit rather painfully that it's not completely ideal for productivity purposes.
Luckily on first play the Transformer seems very close to a have your cake and eat it device so to speak and it gives you the power of windows 8 with the entertainment of android all in a single package. I'll be having a further look at this once the final Australian SKU comes in and once again it's been Dan K, don't forget to hit the middle of your screen to subscribe and ask any questions below!
Today I review the ASUS VivoTab Smart ME400. It's essentially the most inexpensive and most powerful full windows 8 tablet on the market and it's packed full of features like Bluetooth 4.0, NFC, Light Sensors, Camera sensors on either side and dual stereo speakers to boot.
Somehow all of this fits in a 9.7mm thick body that weighs just 580 grams. The super IPS Panel has superior viewing angles of 178 degrees and excellent colour reproducion within a HD resolution screen (1366 x 768).
The unit retails for 599AUD at various channel and retail dealers throughout Australia and if you have any questions about the unit I'll be more than happy to answer them below.
ASUS ROG ARES II Dual 7970 6GB GPU, it's finally here. ASUS and ROG have produced the worlds fastest graphics card and by some margin, we take a close look at the card and true to it's ARES roots, the design and performance is absolutely second to none.
ARES II is the culmination of highly binned performance 7970 GHZ Edition GPU Cores on a completely custom PCB layout. The VRM's and PWM's on this card have their own cooler separate to the main GPU heatsinks for maximum overclocking ability.
Welcome to my ASUS Taichi 31 Laptop Tablet Review and Unboxing.
My name is Dan K and today we are looking at a really versatile laptop that folds down to become a tablet. An interesting hybrid to say the least, one that works well and is pretty much a non compromise solution who want both. You do feel that this laptop was made with Windows 8 in mind and the gorilla glass on the front oozes quality whilst giving off some assurance that your ASUS Taichi will survive some of what life throws at it.
This particular model was running an i7 processor with a 256GB SSD that pushes the very limits of the SATA 3 interface running an incredible 495MB/s sequential read on our tests. Pixel density is impressive on the 13 inch display with the dual Full HD displays performing well during my review use.
Battery life is surprisingly good with around 3 to 4 hours mixed video play back and internet browsing use. ASUS has gone all out on the sound setup as well with Bang & Olufsen ICEpower speakers on either side of the laptop. A brushed metal finish wraps the entire device and it's about the thickness of a USB plug as you can see which is nothing unexpected from the Intel Ultrabook specifications.
So you decided to either buy a laptop, notebook, tablet or desktop PC with Windows 8 Pro and you are immediately out of your comfort zone, rolling in the deep (Thanks Adele). No worries, mate (straya day just passed), just sit back, relax and enjoy the review of the OS of the future.
Windows 8 Pro isn't nearly as daunting as some may have you believe regardless of the media hype surrounding it. Yes you can use it in a professional setting and yes you can use it on tablets. It does some things well and in other parts, it hasn't changed which is a bit annoying but I vent those points in the video above anyhow.
Think of this video as a review with shortcuts and how to's included. Here's my most used shortcuts:
Windows + D : Brings up Desktop
Windows + C: Brings up Charms Menu
Windows + X: Brings up system shortcuts
Windows + E: Brings up the Explorer
Windows + R: Run Command
Windows + Tab: Cycle through Apps
Here is the link to the Nexus dock: http://www.winstep.net/nexus.asp
The music for the video by Blackmill Music: http://www.youtube.com/user/BlackmillMusic
The Bose SoundLink Bluetooth Mobile speaker II is small and light enough (roughly 13 cm x 24 cm x 4.5cm; less than 1.4 kg) to carry in one hand or fit in a backpack ortravel bag. Control power and volume with buttons on top of the speaker,while your Bluetooth device controls everything else;playlists, streaming music stations, etc. No remote control needed.
The 10m wireless range lets you keep your phone, tablet or other device with you while you place the Bose SoundLink Mobile speaker II wherever you want. The integrated bi-fold cover flips open to become a stand for instant playing anywhere.
Bose wasted no time at all ensuring that this connects quite fast to a host of devices and we've had no problems connecting to anything from Nokia's, Apple Iphones, Macbook Pro and my own personal ASUS G75VW.
Welcome to the ASUS VivoBook S200 Touch Screen Laptop Review!
I was always going to look at something entry level and they don't come more entry level than this HD Touch Screen Notebook which is seeing asking prices of 499AUD on certain SKU versions.
What do you get with your typical purchase? Well you get a full copy of Windows 8, completely aluminium construction and a whole host of connection options from USB 2 and 3, VGA, HDMI, Ethernet and more.
It's an Ultrabook specification so it's not thick or bulky and comes bundled with Intel HD4000 graphics so your videos and some casual games will run without issue. My test unit was nice and responsive and that's in part to Windows 8 making the most out of the hardware within. The battery is a full polymer cell that has up to 3 times the recharge cycles than lithium ion and the instant on feature will have you into the OS in and around 2 seconds from opening the lid.
Really enjoyed the ASUS VivoBook S200, do check it out the various SKU's and price ranges on Static Ice here: http://www.staticice.com.au/cgi-bin/search.cgi?q=asus+s200&spos=3
ASUS has been fairly busy lately in the monitor department and their design ethos from the MX Designo Series is starting to trickle down to some of their entry level models with fairly eye catching results.
The ASUS VX238H is the first case in point with an ultra slim profile coming in at 13.9mm thick and the reminiscent sun dial inspired stand which looks mint and is more importantly, very stable. The screen is a TN panel which essentially means you are sacrificing viewing angles for speed and response time and when you consider that this monitor is entry level at 239AUD and that it houses a panel that can do 1ms Grey to Grey Response times, you wonder why it wasn't marketed directly as a gaming monitor.
Screen
In person the screen is of decent quality and ASUS bundles their typical smart contrast ratios and different colour correction modes based on the content you plan to watch or interact with. There's an alignment grid overlay which is useful when you consider that you have your own choices in regards to image editing software and did we mention that it's a 23 inch panel as well?
As mentioned, 23 inches is seen to be perfect for gaming monitors in terms of size and pixel density when it comes to Full HD screens. It's popular because you can sit relatively close to the panel without seeing individual pixels and that's a big plus in the gaming community. Inject the decent asking price and 1ms response times and you have what is by and large a very positive value proposition for a very niche portion of the market.
Watch the video for the full specifications and don't forget to subscribe to my YouTube Channel!
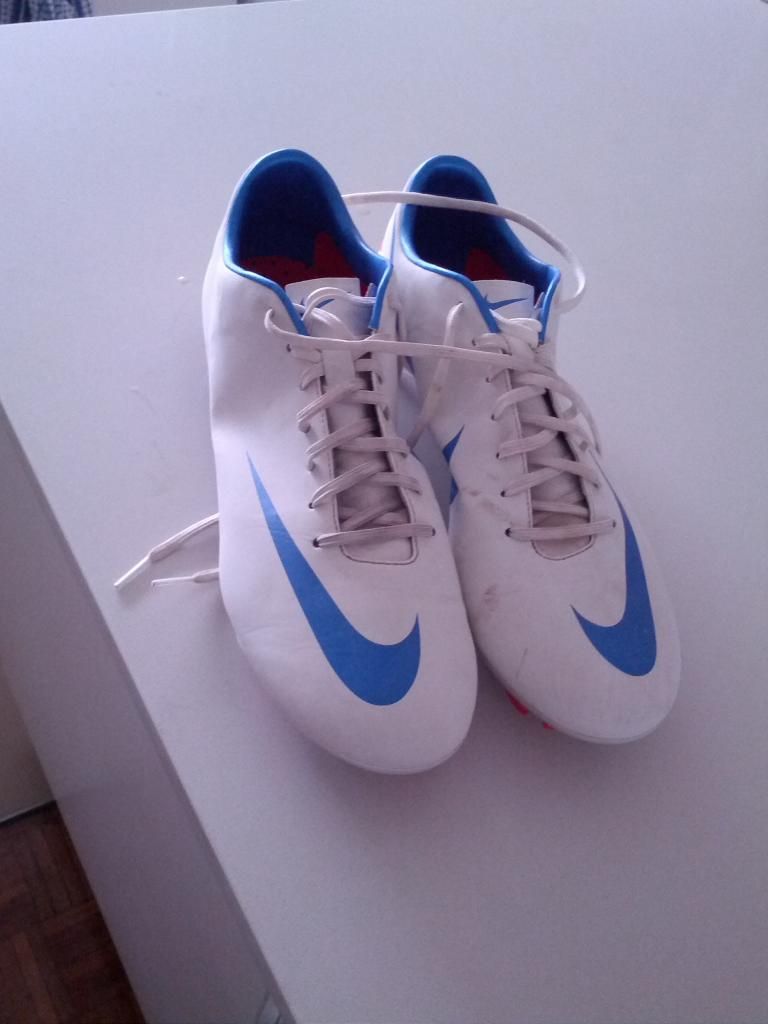
So you're a soccer or football player and you want a light boot that doesn't suck. Enter, the Adidas F50 Adizero 2013 miCoach 2.
Now you're probably thinking, what do I know about boots or even, what do I know about football in general and the fortunate answer for you is, heaps. I've played in the Brisbane Premier League and currently dwell in the Sydney State League so I go through a few boots and I'm a fast type of player so naturally, I love my speed boots.
But before we get to the review lets clear something up in relation to speed boots. I loved the Vapor 3 boots from Nike and from a technical stand point, they were brilliant. So brilliant in fact that I played them to the ground and by that stage, I couldn't buy my size anymore.
Above: Not even tape can fix that.
Lucky for me, the F50 White Lightnings got released on Kitbag and so my love affair with the Adidas F50 range started. These boots by the way, they have to be the nicest, cleanest looking boot I've ever had the pleasure of wearing.
It just doesn't get better than this F50 White Lightning
So when those F50's finally died two seasons later I made arguably the most expensive mistake I've ever made in football. I bought the Nike Vapor VIII.
These guys savaged my feet
I sold them after 5 months of wear as they never broke in, constantly slipped due to overly retarded stud placement and generally savaged my feet whenever they could. It was as if Nike, a company who made the almost perfect Vapor III boot had gone backwards with every iteration and arrived at a boot that only narrow footed players could ever hope of using.
What I did next though, was brilliant. Kitbag had just released the Adidas Adizero F50's in yellow and I decided after much deliberation to go for it and spent another 260AUD, hopefully this time on a boot that brought back the touch and feel of my original F50 White Lightnings.
So here we are, we can go on with the review now.
Adidas F50 Adizero 2013
For a start, these boots are remarkably in line with the same touch and feel of the previous generation so if you are a bit curious on sizing and you've had F50's before then just stay with the same size you had. If you've never had F50's before then go to your nearest store to try them on and then buy them online because you'll save at least 100AUD I've found and if you save the same amount, feel free to thank me by subscribing to my YouTube Channel .
Adidas has gone a bit crazy with the marketing though and everything is sprint skin this and sprint web that but really, I'm just going to cut through that bullshit and let you know the changes in terms you can understand.
Touch and Toe Box
With speed boots you can generally feel the ball contact your foot a bit better but this is sometimes not the greatest thing especially if it's cold and you need to kick a ball really hard. Same goes for tackles and if you get stood on and generally speed boots coincide with metatarsal injuries, sore heels and black toes. I mention this because I've got the latter two whilst I know a few players who have broken metatarsals whilst wearing ultra light cleats like the F50's.
If you can accept that risk then read on, if not then perhaps the T90's, Adipures or Predator Range are more suited to your style of play. I personally play on the wing so it's a risk I take to get the most out of my game and in my opinion the touch is brilliant with the toe box being tight and well in control when it comes to shooting. The contact isn't too hard on the foot and is a slight but measurable improvement over the previous generation F50's.
Stud placement and Grip
Triangle shaped studs. It's such a good idea that you kind of wonder why noone else had thought of it prior to the mainstream F50 range. The grip this boot provides is in fact, the best I've encountered on any boot, ever. Change of pace, change of direction, wet or dry. The F50's cling and cling well to keep you on the front foot instead of plump on your ass.
Heel Counter
I did have some issues with the heel counter initially and it caused blisters for around 3 weeks when training three times a week. I'm not sure if my skin got tougher or the boot finally changed shape but the heel counter isn't causing any issues any more and I don't experience slip either. It's a minimalistic heel counter that does it job when sprinting or changing directions.
Overall Opinion
These boots are by and large the best you can get at the moment. Adidas has indeed hit a winner whilst Nike continues in some ways to be scoring own goals by segmenting their boot to the narrow footed only. I have wide and flat feet for the record and I can't go back to the Nike range because of it and that's unfortunate because that means less choice for me in the long run.
The fortunate of course is that the Adidas F50 2013's are brilliant, absolutely brilliant and I quite simply have no problem with recommending them over anything else in the market right now. If you have any questions about the boot or my opinions of it then simply ask me below or on the YouTube review video.
This review is all about the Hero 3 Black Edition (yes we can all read the title) although the Hero 3 Black isn't the only Hero 3 that GoPro decided to release.
So what other Hero 3's are lurking out beneath the yonder and what do you need to know about them?
Well for starters, the Hero 3 Black Edition is the only Hero 3 with a physically different lens to the one found in the Hero 2 and quite a few reviews have found that the Hero 3 White and Silver editions are in terms of footage, completely identical in quality to the previous generation and much older GoPro Hero 2.
Price/Performance:
Lets start with price since everyone from Joe Blogs to Negative Nancy seems to think that this camera is expensive for what you are getting. This camera is targeted towards the higher end of the market but the price really suggests otherwise and if you're keen as keno you can pick up a Black Edition in Australia for around 450AUD including postage at the time of writing.
For that small fortune you essentially get a camera that can film up to 4K resolution and can tackle bumps, falls and drownings all in the same sitting. It's got several field of vision settings without needing a lens change and it also comes with a wifi dongle so you can remotely control your cameras with ease.
The Hero 3 Black Edition is professional grade and due to it's size it's being used by large television networks to film content that generally ends up on your big screens at home, such confidence in the footage quality isn't unfounded either if you take a look at the review I did on it on YouTube.
To put it simply, this camera is by all means inexpensive for what you get and lets not forget you can do 4K footage at fairly limiting 15 FPS, something that very few cameras for 10 times the cost can do right now. It's not without its uses though as quite a few inventive creators have used the 4K setting with the time lapse feature with great success. This feature is more for future proofing unless you can afford to pony up the 20,000 to 40,000 Aussie dollars currently required to own a 4K projector or TV.
Forget the 4K for a moment though because 1080p at 60 FPS is where it's at and 720p runs in at an insane 120 FPS. Such high FPS figures allow you to slow down the footage without getting a choppy finished product and this is possible simply because the frames you require are there, ready for you to use. I personally don't do too much awesome flippy stuff to really utilise slow motion but I do use it to make some of my product shots and pans much smoother without having to use a dolly.
Underwater Filming:
One of the things you'll want to try out is the underwater case that each unit comes with. It's rated at 60m depth although due to my diving licence, I'm not allowed below 12m. Here is a video I did diving with sharks at Cook Island, NSW. It's about 30 minutes from the Gold Coast and is really a lovely diving spot. The underwater performance is pretty damn good although I should have used a red filter, the type that Polar Pro Filters stock as a snap on now. These filters allow you to see a wider spectrum of colour underwater because at just 5m depth, the amount of red spectrum penetrating the water lowers significantly giving you much greener, bluer footage. Thankfully, this can be fixed quite easily with the filters linked above.
Battery Life
The battery life on the GoPro is by my own admission, fairly bad and with the internal battery you may see 35 to 45 minutes footage whilst filming at 1080p 60FPS. The battery bacpac almost doubles this figure but certain situations ensure that you cannot replace the battery whilst doing all those extreme things you enjoy doing like frolicking in the rain or more importantly, being 12m under water.
There is a third party battery charging unit called Wasabi Power although I can't speak of it first hand as I don't actually have one. If I was heading to the snow for a day of powder then yes, I will be getting one and stuffing a whole nugget of pre-charged batteries in my pocket for the day out.
Mounts
The GoPro Hero Series has a pretty universal mounting system that has seen many custom mounting solutions crop up for every conceivable circumstance of expected use. GoPro of course have their own proprietary mounts which are pretty well built if I'm honest and in my opinion, still a bit expensive for what they are despite the quality.
Mount to your bike handle bars, helmet, snowboard, kite, goggles, pet...you name it, there's a way to mount this camera. It relies on the power of friction in a 3 by 2 fork set up to hold it in place with a tightening bolt and a hex end cap. If none of that made sense, just watch my video and you'll suddenly understand.
Cineform Studios and Post Processing Cineform Studios allows you to colour correct and process your footage to produce vastly different results than you had initially filmed. It's powerful and incredibly useful and did we mention that it's free?
Well, It's free. It's absolutely 100% free for GoPro users to take advantage of and use.
So what does the infamous Cineform Code 444 do? How can it transform your life and make your wife and kids love you?
Well for starters, you'll need to switch to ProTune mode and select CAMRAW as your white balance and then the rest is all gravy, just follow my tutorial on how to use it above and bobs your uncles sisters nephew.
Should you buy one?
This is always a tough one because I bought one and I love it but lets not get all emotional here. The premise behind any purchase is a perceived need so this question inevitably becomes, well do you need one?
I'd love to get a bit more philosophical than that but I really don't know what you will be using the Hero 3 for so I can't recommend it to you on an activity specific basis. What I can do is encourage you to watch the video at the start of this review and show you the quality of footage this camera spits out and you can make up your mind from there.